
Want to switch the font across every caption in your video without editing layers one by one? With AE Juice Auto Captions, one font change updates all captions in the current video at once. Here’s the full workflow.
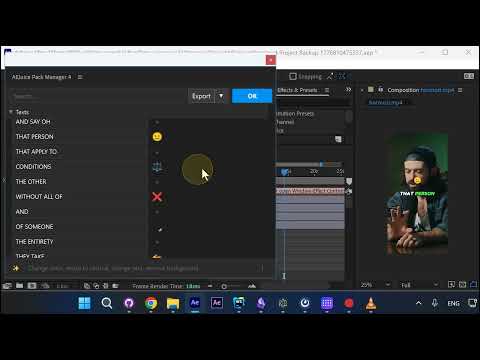
Step 1: Open the Auto Captions Editor
Click the Edit button in the Auto Captions panel to open the caption editor.
Step 2: Locate the Highlighted Caption
By default, the current caption shown in the preview is highlighted in the editor, so you always know which text block corresponds to what’s on screen.
Step 3: Click the Text to Change the Font
Click on the caption text inside the editor, then pick a new font from the font dropdown.
Step 4: Apply the Font Across All Captions
The font change is automatically applied to every caption in the current video — no need to select layers individually.
Step 5: Confirm the Bulk Update
You’ll see a confirmation that all text layers were updated at once — in this case, 49 layers refreshed instantly.
Step 6: Adjust Font Size the Same Way
The same bulk-update logic works for font size. Change it once and every caption updates.
Step 7: Jump to Any Caption via the Timeline
Click on any other caption in the editor and the timeline scrolls to that moment automatically, so you can preview the result on the right side of the screen.
Step 8: Use Search to Find a Word or Phrase
Need to tweak a specific caption? Use the search field at the top to jump directly to any word or phrase.
Wrap Up
Changing fonts across dozens of captions used to mean hours of manual work. With Auto Captions, it’s one click — font, size, and every caption stays perfectly in sync.
Try AE Juice Auto Captions for your next project: aejuice.com