
Color grading in Premiere usually means hunting for a .cube file on disk, adding Lumetri Color, and pointing it at the right folder. With the AEJuice LUTs pack inside Pack Manager 4, it is a browse-and-click job instead.
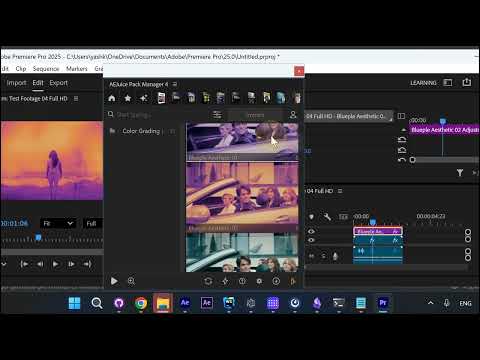
1. Browse the Color Grading category
Open Pack Manager 4 inside Premiere Pro and select the LUTs pack from the top row. The left panel shows the Color Grading category with 35 looks. Each thumbnail is a live preview of the grade — Blueple Aesthetic 01, Blueple Aesthetic 02, Contrast Warm 02, Cyan, and the rest.
2. Pick a look and hit Import
Click the look you want, then press Import. If the pack files are not on your machine yet, Pack Manager downloads them for you — a progress bar shows the size and remaining time, and you can send it to the background and keep working.
3. The grade lands on your timeline
Pack Manager adds an adjustment layer above your clip (named after the LUT, e.g. Blueple Aesthetic 02 Adjustment) carrying the Apply LUT effect. Open Effect Controls and the effect sits right there with its own controls and a Blend Mode — no external .cube file to keep track of, and nothing to relink later.
4. Swap the grade any time
Because each look is its own adjustment layer, changing your mind is cheap: go back to the Color Grading list, import a different look, and compare them on the timeline.
Get the LUTs pack and the rest of the AEJuice library at aejuice.com.